 Download
How to Drill Through Rock with a Self-Drilling Anchor Bolt: Complete Guide
Time:2026-03-27From:sinorock View:
Drilling through rock can be one of the most challenging tasks in construction and geotechnical projects—but self-drilling anchor bolts make it far more efficient and reliable. Combining drilling, grouting, and anchoring into a single operation, these anchors provide immediate support in loose, fractured, or water-bearing rock, reducing the risk of borehole collapse and project delays. This complete guide explores the types of rock suitable for installation, how to select the right drill rig, step-by-step procedures, and expert tips.
1. Introduction to Self-Drilling Anchor Bolts
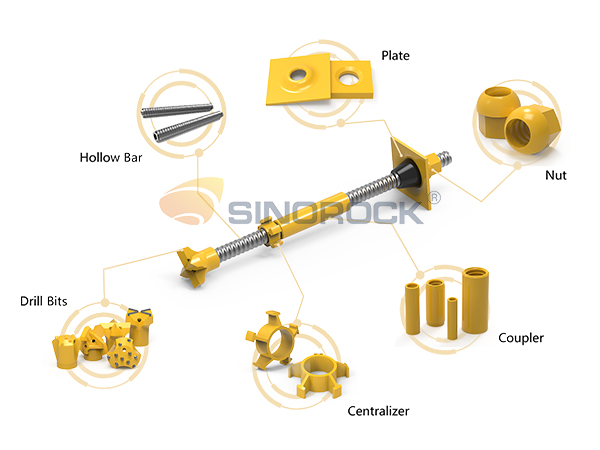
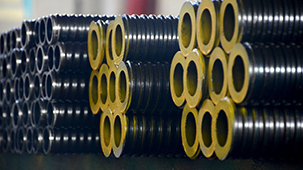
A self-drilling anchor bolt is a composite anchoring system that combines a drill rod, anchor bar, and grout conduit into a single unit. This integration allows drilling, grouting, and anchoring in one continuous operation, improving efficiency and reliability, especially in fractured or loose rock.
Core Components:
· Hollow Anchor Bar: A hollow steel tube transmitting torque and axial thrust from the drill rig while serving as a conduit for high-pressure grout.
· Continuous Thread: Connects the drill bit, couplers, and nuts; also ensures strong bond strength with the grout.
· Drill Bit: Typically a cemented carbide cross bit or button bit, responsible for breaking the rock at the leading end of the bar.
· Coupler: Connects standard-length anchor bars to achieve the required drilling depth.
· Plate and Nut: Installed after grouting for pre-stress application, if required.
Key Advantage: Self-drilling anchors follow the principle of “drilling while supporting”, preventing borehole collapse in loose, fractured, or water-bearing ground.
2. Typical Project Applications
Self-drilling anchors are widely used in challenging geotechnical projects, including:
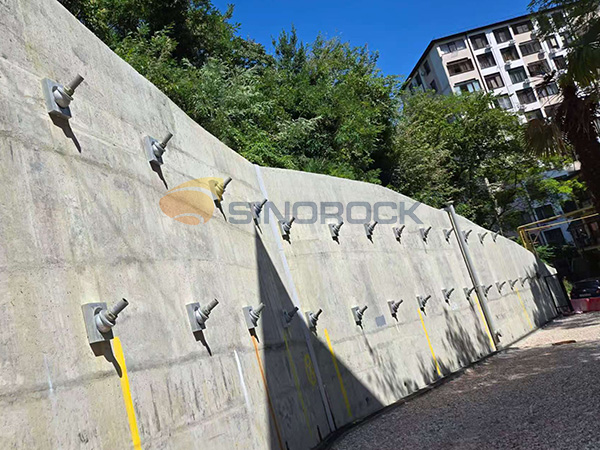
· Slope and Tunnel Support: Deep stabilization for highway and railway slopes, tunnel spiling (forepoling), and systematic support in tunnel excavation.
· Foundation and Deep Excavation: High-rise building and bridge foundations requiring tension anchors or ground anchors under high tensile loads.
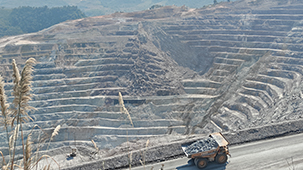
· Mining and Quarrying: Roof bolting, rib support in mine roadways, and stabilization of high-risk rock masses.
· Seismic Retrofit: Strengthening existing structures in weak or fractured rock formations, such as retaining walls or bridge piers.
· Micropiles: Elements for resisting significant vertical and horizontal loads.
3. Rock Types for Installation

Selecting the correct drill bit depends on rock unconfined compressive strength (UCS):
· Soft Rock (UCS < 30 MPa): Weathered rock, mudstone, shale, chalk. Use cemented carbide cross bits.
· Medium-Hard Rock (UCS 30–80 MPa): Sandstone, limestone, hard shale. Use cross or button bits with high wear resistance.
· Hard/Very Hard Rock (UCS > 80 MPa): Granite, basalt, quartzite, dense limestone. Button bits are mandatory; DTH hammers may be required for very hard rock.
Note: Self-drilling anchors are particularly effective in fault zones, gravel layers, or man-made fill, preventing borehole collapse.
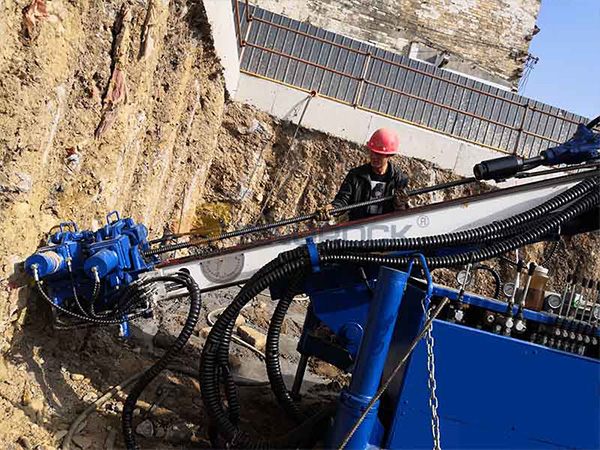
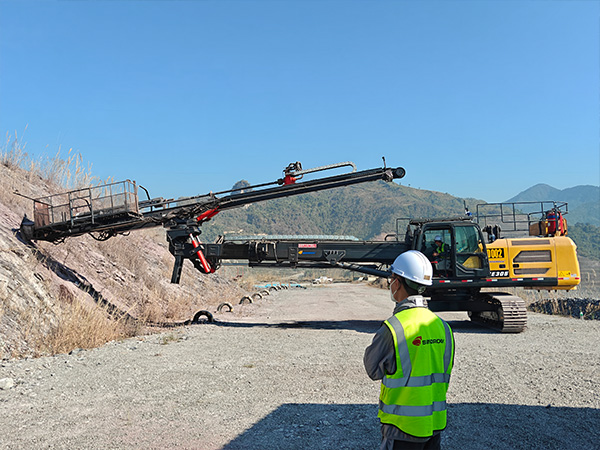
4. Drill Rig Selection

Selecting the right drill rig is essential for efficiency, hole quality, and project cost. Rig selection depends on geology, hole diameter, depth, and site constraints.
Principles for Rig Matching:
4.1 Geological Conditions
·Soft/Weathered rock: rotary-percussive rigs with adjustable rotation speed and moderate torque.
·Hard/Fractured rock: heavy-duty rigs with high axial thrust; DTH hammers may be incorporated.
4.2 Site Constraints
· Confined spaces (tunnels, steep slopes): compact, modular, crawler rigs.
· Open, large-scale projects: rigs with automated rod handling, integrated grouting, and high endurance.
4.3 System Integration
· Align rig torque, impact, and feed force with anchor diameter, thread type, and bit selection.
· Ensures higher single-hole efficiency, minimizes rod jamming, breakage, and hole deviation.
Additional Consideration: Ensure rigs comply with safety standards for high-slope or underground operations.
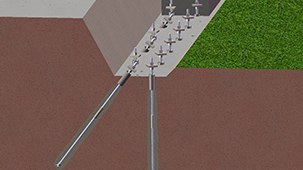
5. Installation Procedure for Self-Drilling Anchors
5.1 Pre-Construction Preparation
· Equipment Check: Inspect hydraulic circuits, air, and water lines; verify rotary head seals.
· Material Inspection: Confirm anchor diameter, wall thickness, bar length, and thread compatibility (commonly R32. R38. T40).
· Grout Mix Design: Trial mixes according to design (typically M30+); add accelerators if early strength is needed.
· Layout & Marking: Mark anchor positions accurately per engineering drawings.
5.2 Construction Steps
5.2.1 Assemble Bit and First Anchor Bar
Screw carbide drill bit onto the leading bar end; tighten with a specialized wrench. Insert bar into rig shank adapter.
5.2.2 Drilling
· Start rig, activate air/water flushing.
· Drill at low speed initially to maintain alignment.
· Apply proper feed force and impact energy. Increase impact for hard rock; rotation for soft rock.
· When within 10–15 cm of rig chuck, stop, connect next bar section via coupler, and continue. Repeat to reach design depth.
5.2.3 Hole Cleaning
Flush borehole with high-pressure air/water for 1–2 min to remove debris.
5.2.4 Install Bearing Plate and Nut (Optional)
For tensioned anchors, wait until grout reaches design strength. Non-tensioned anchors may install plate and nut immediately.
5.2.5 Bottom-Up High-Pressure Grouting
· Connect grout pump to anchor tail or rotary swivel joint.
· Grout flows to hole bottom and back up the annulus.
· When grout emerges without air bubbles, close packer and maintain 0.5–1.0 MPa for 1–2 min.
5.2.6 Tensioning and Curing
· Apply pre-stress after grout reaches design strength (3–7 days, depending on accelerator).
· Follow standard concrete curing practices.
6. Key Construction Precautions

· Hole Deviation: Start drilling with low rotation and feed force; use guide bars or collar pipes.
· Thread Protection: Avoid damage; ensure couplers are fully tightened.
· Bit Selection: Cross bits for soft/medium rock; button bits for hard rock.
· Flushing Failure: Insufficient air/water leads to bit jamming; stop advancement and alternate rotation.
· Grout Loss: For fractured rock, use intermittent grouting or accelerators.
7. FAQ
Q1: Can self-drilling anchors replace conventional anchors?
A: Yes, in loose, collapsible, or water-bearing ground. Conventional anchors may be more cost-effective in stable rock.
Q2: Rod stuck during drilling?
A: Stop, maintain rotation, increase flushing. Try slow retraction or reverse rotation. If grout is set, abandon hole if necessary.
Q3: How to ensure full grout compaction?
A: Use bottom-up method, maintain specified pressure (≥0.5 MPa), ensure fluidity, and use non-shrink or micro-expansive grout for upward/horizontal holes.
Q4: Maximum drilling depth?
A: Depends on ground conditions, rig power, and bar strength. Standard 3–6 m bars achieve 20–40 m; greater depths require careful coupler alignment and increase deviation risk.
Q5: How to verify anchor load capacity?
A: Conduct pull-out tests or non-destructive integrity tests per project specifications.
8. Conclusion
Self-drilling anchor technology integrates drilling, grouting, and anchoring into a single operation, improving safety and efficiency in complex rock formations. Key factors for success:
· Accurate geological assessment and bit selection
· Proper rig selection with adequate torque and impact
· Rigorous flushing control to prevent jamming
· Standardized high-pressure grouting for optimal anchor capacity
Mastery of self-drilling anchors allows engineers to address slope instability, tunnel collapses, and excavation challenges efficiently. With advancing machinery and materials, applications in deep excavations, high slopes, and urban underground spaces are expected to grow.
latest news
-
- Mine Support and Stabilization Technology: Self-Drilling Anchor Bolt Systems
- Time:2026-04-23From:This Site
- Professional mine support solutions integrating drilling, pipe roof processes, and self-drilling anchors to ensure stable, safe, and efficient operations for both underground and open-pit mines.
- View details
-
- Self-Drilling Anchor Bolt Systems in Railway Tunnels: Applications and Standards
- Time:2026-04-21From:This Site
- Explore the applications and international standards of self-drilling anchor bolt systems in railway tunnels. Learn how they enhance slope, tunnel, and bridge stability for safer railway infrastructure.
- View details
-
- Self-Drilling Anchor Bolts for Micropiles: Complete Geotechnical Engineering Guide
- Time:2026-04-18From:This Site
- Explore the benefits of SDA bolt micropiles for constrained construction sites, complex geology, and rapid installation. Case studies and practical guidelines included.
- View details
-

- Sinorock 2025 Quality Month | Strengthening Quality Foundations, Empowering Product Excellence
- Time:2025-08-13From:This Site
- Sinorock’s 2025 Quality Month, themed “Strengthening Quality Foundations, Empowering Product Excellence,” successfully concluded, reinforcing our commitment to superior product quality.
- View details
-
- Sinorock Safety Month 2025 | Everyone Speaks Safety, Everyone Can Respond
- Time:2025-07-03From:This Site
- Sinorock Safety Month 2025, centered on the theme "Everyone Speaks Safety, Everyone Can Respond - Spot Workplace Hazards," has wrapped up successfully!
- View details
-
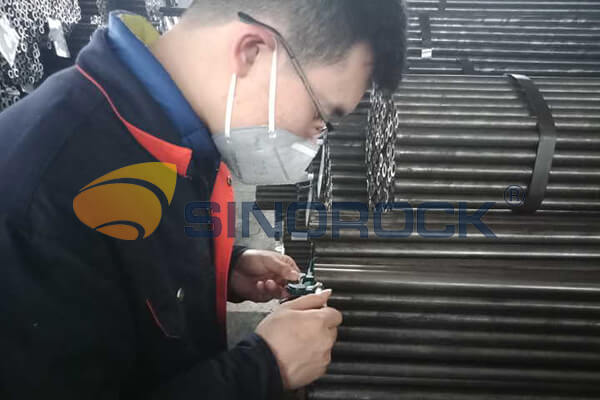
- Quality Control: the Vital Factor of A SDA Bolt Factory
- Time:2025-01-09From:This Site
- Sinorock’s comprehensive quality control system, from supplier management to outgoing inspections, ensuring the highest standards for self-drilling anchor bolts in construction.
- View details
-
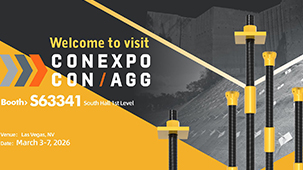
- Sinorock Invites You to Visit Us at CONEXPO-CON/AGG
- Time:2026-02-14From:This Site
- Sinorock Invites You to Explore Proven Self-Drilling Anchor Bolt Solutions at CONEXPO-CON/AGG –S63341.South Hall 1st Level
- View details
-
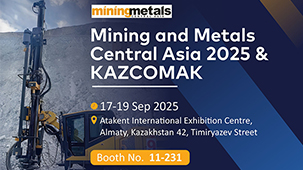
- SINOROCK to Showcase Innovative Mining Solutions at Mining and Metals Central Asia 2025
- Time:2025-09-09From:This Site
- We are pleased to share that SINOROCK will participate in the Mining and Metals Central Asia 2025, taking place from September 17 to 19 at the Atakent International Exhibition Centre in Almaty, Kazakhstan. You can find us at Booth 11-231.
- View details
-
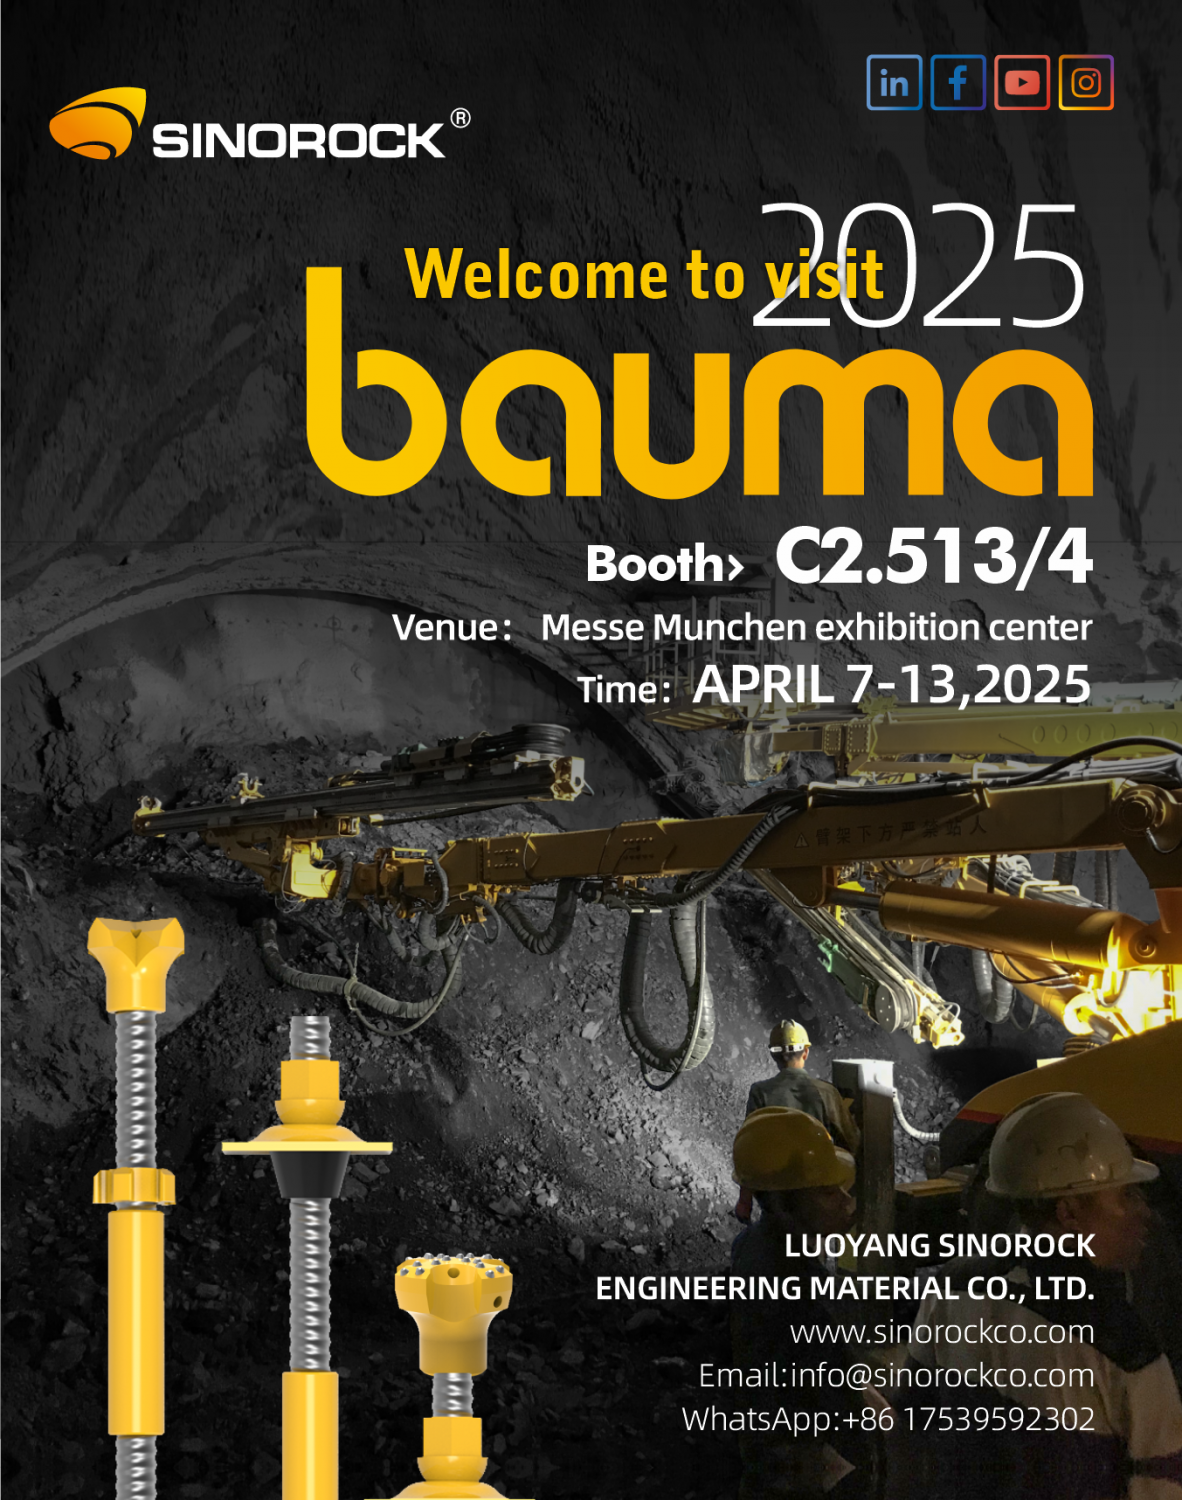
- Sinorock Invites You to Explore Proven Self-Drilling Anchor Bolt Solutions at bauma 2025
- Time:2025-03-07From:This Site
- From April 7–13, 2025, explore Sinorock’s Self-drilling anchor bolt solution at Booth C2.513/4 in Hall C2 of the Messe München Exhibition Center (Munich, Germany).
- View details
