 Download
8 Steps to Tell You How to Install Soil Nail Wall
Time:2023-04-23From:sinorock View:
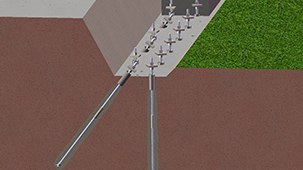
Soil nail wall is a more commonly used support method in foundation support engineering. The slope of the foundation is reinforced by soil nails made of steel bars or self-drilling anchor bolt and other support materials, and a steel mesh is laid on the surface of the slope. A side slope reinforcement type support construction method combining spraying a layer of concrete surface layer and earthwork side slope.
Advantages of Soil Nail Walls
l Fast and low cost
Soil nail walls can be installed faster and at a lower cost than other support systems. Soldier pile walls or sheet pile walls require large equipment to drill or drive the piles or slabs in place. For driving-in soil nails, the speed is faster, and the installation time can be reduced by more than 30%.
l Suitable for hard rock
Soil nail walls are a great option when the soil covers hard material or rock. In contrast to sheet piles or soldier piles, soil nail walls can be installed in soil as well as in rock if the excavation extends into the rock. The smaller holes required to install soil nails are easier to accomplish than the larger diameter holes required for soldier piles.
l Wide selection of soil nail wall facing
Many sites require a mix of "top-down" retaining walls, such as soil nail walls, and "bottom-up" retaining walls, such as segmented block walls or poured concrete retaining walls. Customers can choose economical and suitable facings according to the actual situation of their projects.
Construction Process
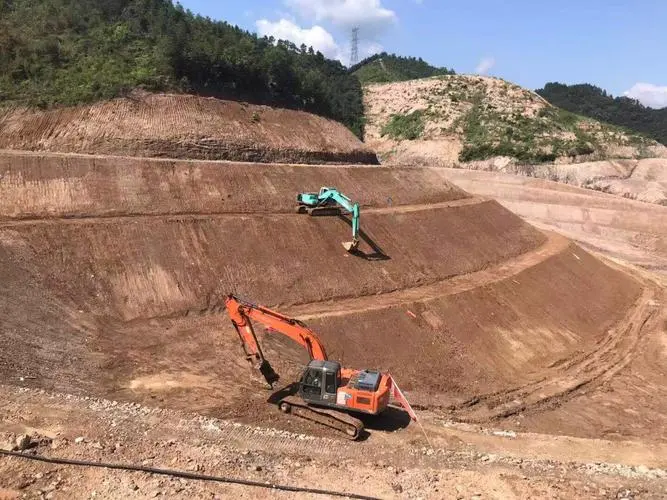
1. Finishing the slope
The earthwork shall be excavated in layers and sections, the excavation depth of each layer shall be consistent with the vertical spacing of the soil nails, and the excavation elevation shall be 200mm below the soil nails. After each layer of soil is excavated, it should be trimmed to remove protruding soil and compact the loose soil on the surface to ensure the smoothness of the sprayed concrete surface.
2. Primer sprayed concrete
The spraying sequence of shotcrete should be from top to bottom. The distance between the nozzle and the sprayed surface should be controlled within 0.8~1.5m. The spraying direction should be vertical to the spraying surface.
3. Soil nail positioning, drilling and clearing
Before drilling, the holes should be marked and numbered according to the design requirements. When the soil nails are drilled, aim at the hole position and drill slowly. When a certain depth is reached and the soil layer is relatively stable, it can be drilled at a normal speed. Drilling must not disturb the surrounding formations, and high-pressure air or water cleaning is used to clean the holes after drilling.
4. Place soil nails
The main reinforcement of the steel bar is cut according to the design length plus 20cm, and the outer end is equipped with a 90-degree 20cm hook. The main reinforcement is welded to the centralizer every 1~2m to prevent the main reinforcement from deviating from the center of the soil nail. The structure of the bracket should not hinder the freedom of the grout during grouting flow. When placing the main reinforcement, tie the grouting pipe and the main reinforcement together, the grouting pipe is about 0.5m away from the bottom of the hole, and the end of the soil nail is connected with the reinforcement and the reinforcement mesh in the surface layer through the reinforcement.
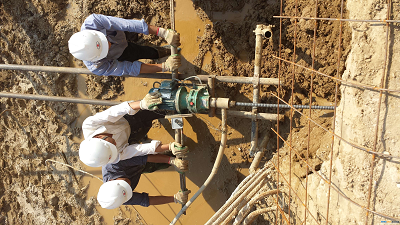
5. Grouting
Pressure grouting should be used for grouting. The conduit is first inserted to a distance of 250~500mm from the bottom of the hole, and a grout stopper is installed at the hole, and the pressure is maintained for 1~2min after filling. Pull out the conduit slowly and evenly during grouting, and the grout outlet should always be buried under the surface of the grout in the hole to ensure that all the gas in the hole can be discharged. The grout mix ratio and grouting pressure shall be controlled according to the design requirements.
6. Binding steel mesh
The reinforcement mesh shall be constructed layer by layer along with the soil nails, and the thickness of the protective layer shall not be less than 20mm. The slope line is 0.5m.
7. Install the drainage hole
Insert a horizontal (slightly downward) drain pipe with a length of 400~600mm and a diameter of not less than 40mm on the back of the support surface, and its outer end protrudes from the support surface. The distance between the drain pipes can be 1.5~2m, so that the accumulated water inside the soil layer behind the surface layer is discharged.
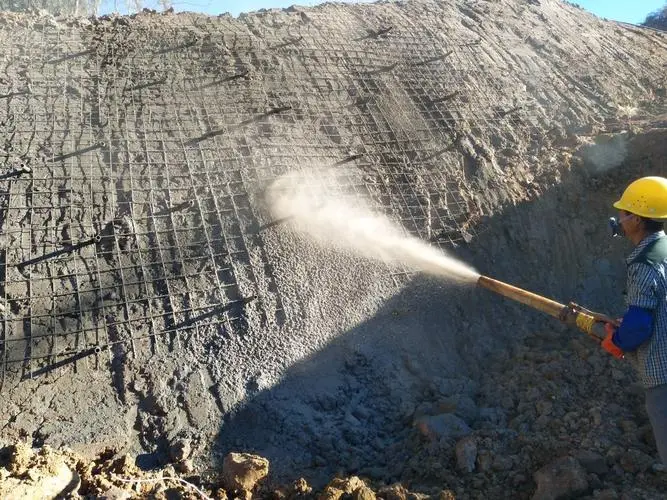
8. Shotcrete
Concrete construction starts after the reinforcement mesh and soil nails are accepted, and the nozzle is kept perpendicular to the surface to be sprayed. When the thickness of the surface layer exceeds 100mm, the concrete should be sprayed in layers.
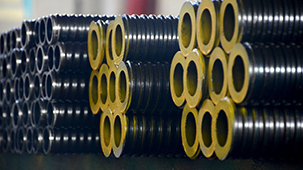
Self Drilling Anchor Bolt
The above is the construction technology of traditional soil nails, and self-drilling anchor bolts can also be used as soil nails. The main feature of the self-drilling anchor bolt is that it can be drilled and grouted simultaneously without retrac the drill rod, which can save construction costs and shorten the construction period while reducing the process. If the project encounters broken ground, easy to collapse holes and difficult to form holes, the use of self-drilling anchor bolts is more efficient and lower in cost, and it is the best alternative to traditional soil nailing construction. Sinorock is a professional self-drilling hollow bar manufacturer and engineering solution provider, welcome to consult sinorock@sinorockco.com for more information.
latest news
-
- Mine Support and Stabilization Technology: Self-Drilling Anchor Bolt Systems
- Time:2026-04-23From:This Site
- Professional mine support solutions integrating drilling, pipe roof processes, and self-drilling anchors to ensure stable, safe, and efficient operations for both underground and open-pit mines.
- View details
-
- Self-Drilling Anchor Bolt Systems in Railway Tunnels: Applications and Standards
- Time:2026-04-21From:This Site
- Explore the applications and international standards of self-drilling anchor bolt systems in railway tunnels. Learn how they enhance slope, tunnel, and bridge stability for safer railway infrastructure.
- View details
-
- Self-Drilling Anchor Bolts for Micropiles: Complete Geotechnical Engineering Guide
- Time:2026-04-18From:This Site
- Explore the benefits of SDA bolt micropiles for constrained construction sites, complex geology, and rapid installation. Case studies and practical guidelines included.
- View details
-

- Sinorock 2025 Quality Month | Strengthening Quality Foundations, Empowering Product Excellence
- Time:2025-08-13From:This Site
- Sinorock’s 2025 Quality Month, themed “Strengthening Quality Foundations, Empowering Product Excellence,” successfully concluded, reinforcing our commitment to superior product quality.
- View details
-
- Sinorock Safety Month 2025 | Everyone Speaks Safety, Everyone Can Respond
- Time:2025-07-03From:This Site
- Sinorock Safety Month 2025, centered on the theme "Everyone Speaks Safety, Everyone Can Respond - Spot Workplace Hazards," has wrapped up successfully!
- View details
-
- Quality Control: the Vital Factor of A SDA Bolt Factory
- Time:2025-01-09From:This Site
- Sinorock’s comprehensive quality control system, from supplier management to outgoing inspections, ensuring the highest standards for self-drilling anchor bolts in construction.
- View details
-
- Sinorock Invites You to Visit Us at CONEXPO-CON/AGG
- Time:2026-02-14From:This Site
- Sinorock Invites You to Explore Proven Self-Drilling Anchor Bolt Solutions at CONEXPO-CON/AGG –S63341.South Hall 1st Level
- View details
-

- SINOROCK to Showcase Innovative Mining Solutions at Mining and Metals Central Asia 2025
- Time:2025-09-09From:This Site
- We are pleased to share that SINOROCK will participate in the Mining and Metals Central Asia 2025, taking place from September 17 to 19 at the Atakent International Exhibition Centre in Almaty, Kazakhstan. You can find us at Booth 11-231.
- View details
-
- Sinorock Invites You to Explore Proven Self-Drilling Anchor Bolt Solutions at bauma 2025
- Time:2025-03-07From:This Site
- From April 7–13, 2025, explore Sinorock’s Self-drilling anchor bolt solution at Booth C2.513/4 in Hall C2 of the Messe München Exhibition Center (Munich, Germany).
- View details
